Sunday 15 October 2023

Turn 28: The Thrappled Lemmings Take It Easy (Five Leagues from the Borderlands)

 Despite being the physical embodiment of chaos and frequently being barred from local taverns, it appears that the people of Haitabu still have some affection for them. Griselda the Baker's Daughter sent them a basket of her floury baps at no cost and Gunnvor the Butcher sent sausages and some offcuts of various beasts. With these and a few other gifts, the Lemmings did not have to pay for food as they rested and waited for Sir Thiebault to heal.

While the others pursued their own interests, Lysanthir and Fulrad trained. Onesipe took all their loot to the market and sold it. He bought Lysanthir some mystic trinkets and a Scout's Cloak for himself.

Later that day, while perusing the treasure map they had found and analysing the other information they had recently learnt, Lysanthir made a breakthrough. He rushed into the tavern taproom where the others were drinking their dinner.

"I've found it!" he cried, " I know where the Temple of Elemental Evil is. We're going to be rich beyond even our wildest dreams!"

The others ignored him. They had heard this all before. And he had been wrong every single time.

Surprise reveal: Lysanthir was not wrong!

In the meantime, Sir Thiebault had been talking to the tavern owner Helga, who asked if the Lemmings could deliver a letter to her cousin Thorvald in Utstein Marknad. She promised that he would pay them when they delivered it. He put the letter in his backpack and told her they would make sure that Thorvald got the letter next time they were there.

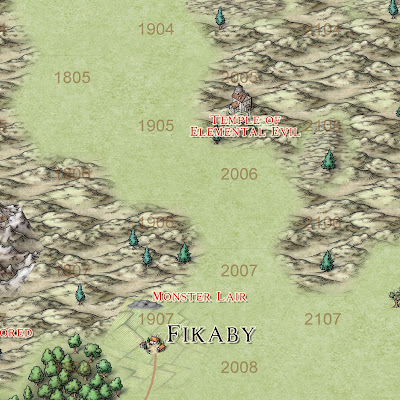
Now that Lysanthir has found the Temple of Elemental Evil, the campaign has a finite end beyond that specified in the rulebook. The Thrappled Lemmings must still defeat the remaining campaign Threats as the rulebook says, but after that, they will attempt the Temple of Elemental Evil delve. It will automatically be the maximum size possible (7 levels) and I am going to work out to what extent I can make it resemble the D&D adventure of the same name, because it is meant to be an epic conclusion to the campaign and this will also play up to my RPG nostalgia. Let's see if they can survive long enough to get there first though.

Turn 27: The Thrappled Lemmings and the Journey Home (Five Leagues from the Borderlands)

 The Lemmings prepared to return to Haitabu. They were able to supplement their supplies with roots and berries thanks to advice from Sir Thiebault, who seemed to be too wounded to do anything much but definitely not wounded enough to stop him barking orders at the rest of them. Fulrad had gone hunting for food but only found some suspicious tracks. Perhaps one of the cultists had survived? Lysanthir had also gone exploring and found 1 congealed strand.

Discussing the tracks with Fulrad and comparing them with notes they had found in the Synod hideout, Lysanthir concluded that the bandits known as the Hooded Men had their hideout near Haitabu. This made sense as they would want to keep an eye on caravans and merchants that could be easy marks. It wasn't like they would wander round in black clothes and badges saying "I am a bandit" after all. Living among those they planned to rob made everything easier for them.

The Lemmings forced the Potion of Valley Mist down Sir Thiebault's throat, packed up and set off for Haitabu. The journey began badly because Sir Thiebault was clearly feeling much better thanks to the potion and insisted on telling them they were going the wrong way and should have turned left at the gibbet, and similar nonsense from the very beginning.

Before they had even got halfway to Haitabu, they were suddenly ambushed by a Goblin war party. Worse yet, the Goblins had a Corrupted Sorcerer with them and they did not look like they wanted to praise the Lemmings for taking down the Synod of Reason. The sorcerer was hanging back on the right flank with a small contingent of Goblins to guard him. Goblin archers had infiltrated the woods to their left, and the ambush was only spoiled by a young Goblin suddenly getting overly enthusiastic and charging straight over the hill towards the Lemmings.

What's that coming over the hill? Is it a goblin?

The Lemmings muttered and grumbled as they hid Sir Thiebault in a bush and drew their weapons to face the onslaught. The initial rush saw Drogo charge the young Goblin, who turned out to have better armour than expected and held off Drogo while his sergeant joined the fray. Lysanthir cast a fog spell to stop the enemy archers shooting, and the others fired off all their arrows at the approaching Goblins.

It was a frenetic start to the battle that saw two of the Goblins and Drogo wounded. Fortunately, Lysanthir was able to reach Drogo quickly and cast a Heal spell on him. Despite the fierce fighting it proved hard to best the Goblins.


Only after what seemed an age did the Lemmings start to get the upper hand. Wido and Onesipe had run out of arrows, and Onesipe was wounded by a Goblin archer, so he drew his sword and moved to support Lysanthir and Drogo. This was the crucial moment. The extra support resulted in the young Goblin and the sergeant being killed. Wido killed another Goblin who had approached from the right flank and prepared to face the last of them. Fulrad sighted on the wounded Goblin archer and killed him. This was too much for the archer on the right flank, who fled. Soon all the Goblins lay dead on the battlefield and only the sorcerer remained.

Seeing the way things were, the sorcerer muttered, "Bugger this for a game of robbers!" He summoned a skeleton and legged it while the skeleton shambled towards the Lemmings. A lone skeleton was no challenge for the might Thrappled Lemmings, and soon all that remained was to loot the corpses and carry on their way. Unfortunately for the Lemmings, all they found was what looked like a treasure map and some bandages.

They carried on their way and had soon reached Haitabu, where they learned that their investment in Karl the Merchant had netted them 8 Marks. It was not a huge profit, but it was still a profit and the Lemmings (apart from Wido) were very much glass half full sort of people.

Back at Haitabu, over a pint or three of the local brew, they learned that the town rangers had been scouting the area to try to make it safe. Joining what they knew with what the rangers had found out resulted in a few dots being joined and Lysanthir felt more certain than ever that he could pin down the location of the temple he was looking for. The map they had found also pointed to opportunities for treasure north of the Hidden Men's hideout, so they might expect even more rich pickings.

That was an interesting fight. This is the first fight I have had where the dice decided that everyone should pass their armour rolls on the first try, even the Goblins, and the toughness rolls were all low too, so it took two hits to kill every Goblin once I finally got past the armour. It was also the first battle where I have successfully cast a Heal spell. The way things were, I think Drogo would have been carried home alongside Sir Thiebault otherwise, assuming he survived.

I thought the Corrupted Sorcerer would be more of a threat, but the speed with which the Goblins died or fled over the course of two turns meant that the sorcerer only rolled to summon skeletons twice, and he fled immediately after rolling the second time. In my head beforehand, I was expecting to face a neverending stream of skeletons that did not happen.

Sunday 8 October 2023

Re-exploring Super Dungeon Explore: Forgotten King

 I bought Super Dungeon Explore: Forgotten King on the recommendation of a guy in a comics/games shop in Cork back in 2016 or so. I've played a few games of it, but not as many as I would have liked. So, it was good to dig it out again this weekend.

The game is a boardgame that is designed to give you the arcade feel. Monsters spawn regularly and attack your heroes, and it feels a bit like games like Gauntlet, but you don't get a voiceover saying "Elf shot the food!" every so often. Also, you can't shoot the food. That is probably a blessing.

Against the Forgotten King Part 1

The heroes are the grey figures on the left of the board. The monsters are all green

I took three characters to face off against the baddies from the base game: The Chevalier, the Warden and the Alchemist. The Silver Chevalier is a melee specialist. The Royal Warden is a missile specialist with a crossbow. The Fae Alchemist is a mage type with special abilities related to potions. I figured this would be a balanced party. It probably was but I played them all wrong. I did read the rules again beforehand, because it is so long since I played, but I now need to read them another time.

"Hey, can I keep this chicken please? I think it likes me!"

So, my heroes entered the first section of the playing area. They took out the spawning point, whittled down the monsters and the first boss came, a mini-boss called Trent, who is a treant. The Chevalier went down quickly, but I had a Princess Coin to spend on a new life for her, so I brought her back. The Alchemist found The Colonel, a chicken whose special ability is to give her an extra attack action. The Warden just did a lot of shooting to no great effect. The Warden charged the second board and took out the spawn point there. A second mini-boss, a bear-serker called Boris, appeared. I should probably have waited, but I am impatient! With two mini-bosses to face and hordes of monsters, my party was easily defeated. This was in part because of lack of familiarity with the rules and misreading the boards (literally!), and in part because of poor tactics. On the plus side, at least I became more familiar with the rules once more.

Against the Forgotten King Part 2

Time to try again. This time I took the Silver Chevalier, a Questing Knight and Princess Emerald. That's two melee types and a princess with a rifle on my side. I had read the rules again quickly, and also realised that I had not noticed the walls on some of the dungeon boards. This was BIG news to me. It also made a difference to my tactics. Funnily enough, despite the realisation about the walls, I also realised towards the end of this game that I had not noticed a wall on one of the boards. It did not make a huge difference, but would have slowed some of the baddies down a bit.

So, the Chevalier was bent on revenge and was going to show that rotten Forgotten King what was what. With her new friends, she approached the Forgotten King's lair afresh. Using the newly discovered walls as cover, she and her friends were able to whittle down the enemy and take out the first spawn point. Trent the Treant emerged from hiding, annoyed at having his Sunday disturbed. Princess Emerald, in particular used the long range of her rifle to pick off the hordes from a distance and draw them away from the Chevalier, who was focused on destroying the second spawn point. She did this and Bashful Boris the Bear-serker also came out to see what the ruckus was all about. Hearing Princess Emerald's rifle shots, he hastened towards her, but not before taking a few swipes and the Chevalier.

A logjam of monsters begins to form

Pretty soon there was a logjam of monsters trying to get past the walls and brambles to Princess Emerald. The others took this opportunity to wade in and pretty soon all of the enemy were dead. The party regrouped and headed out to the last spawn point. Destroying that would entice the Forgotten King out. On the way, they waded into traps and fought giant rabbits with even bigger axes and frog knights on terror birds. Well, something like that anyway. The story seems to change with each can of Irn Bru that the Chevalier drinks.

The Silver Chevalier tells the Forgotten King what she really thinks of him.

Eventually, the Forgotten King was enticed out. The party hurt him but the Chevalier was soon knocked out and the Princess followed. Fortunately, I had enough Princess Coins to respawn them and they returned to the fray where the sheer number of attacks the Forgotten King faced put him down and forced him to retreat to the Underworld again. Phew! It felt tight, but I got there.

Some Thoughts: The Good

Super Dungeon Explore is a pretty good game to play solo. The aggro mechanic (Wrath) that the game uses to decide whom the enemy will focus on works well and is exploitable by the players with a little thought.

The game does have the arcade action feel, and might look amazing if I ever got around to painting the figures, although there is a distinct possibility that my workmanlike style might not achieve the image I have in my head!

Each of the heroes is different and offers different alternatives for play. Some of them require a bit more thought than others though. This is a positive thing, in my view.

The AI for the enemy force is great. You have a deck of options that you draw from each turn. The options range from going turbo on the heroes' posteriors with multiple moves and attacks to griefing the figure with the least Wrath. There are options for stopping to heal, spawning more enemies, if there are any in the spawn pool, and so on. Unlike games like Five Leagues from the Borderlands, you never know quite what the enemy will do. You can expect them to go after the character that has done the most to annoy them, but they don't simply move and fight each turn. It builds a certain extra tension into the game.

The Exploration Cards add some random events, like traps or minor annoyances (Rabid Squirrels that get inside your trousers and slow you down in Forgotten King).

And, being a dungeon crawler, of course there is treasure. When you kill monsters you draw loot cards that you can equip or discard to remove wounds and negative effects. Treasure is good and is important.

There are also quite a lot of different actions that players can take. These lead to meaningful decisions about when to pause and bandage your wounds, what type of attack to make on the enemy, and how to move so that you maximise the damage you do while minimising the damage you receive. It is also important deciding when and how to attack the spawn points. You want to limit the emergence of the enemy, and especially control the emergence of the bosses.

Some Thoughts: The Bad

On the negative side, the rule book is structured according to the turn sequence, but I still spend far too much time flipping through it trying to find the information I need. Some things seem to be scattered in different places under different headings. It makes the game a bit tiring to play. A good quick reference sheet could solve a lot of this, but I do not have one yet. Also, if you play regularly, this will be made less of an issue.

The second negative thing is that the game takes up a lot of table space and would take up even more if I played with the maximum number of heroes. This is not too much of an issue for me at the moment, but it could be at some point.

Thirdly, Super Dungeon Explore takes a while to play. You need to be able to leave it set up or to have several hours free to finish a session. That means it won't work for the typical mid-week gaming night that I am used to. I imagine that playing multi-player would extend that playing time even more to the kind of epic sessions of Talisman that we used to play back when I was young and full of energy.

Finally, the basic game without expansions could get quite samey if you play it a lot. You get four spawn points, two of which are paired, in the base game. A paired spawn point is two spawn points that must always be fielded together and you split the enemies that they spawn between them. This means that a game with three heroes will always have the paired spawn point and one other, and the only difference will be in the order you encounter them. The variety in the game will then come from which heroes you choose and what treasure you find.

Conclusion

Overall, I like this game. It works well as a solo game, despite being quite heavy work when running multiple heroes, which you have to do. It looks great and it gives the right feel during play. It will certainly see my table every so often. However, that is also the issue. I see it as an occasional game, but the rules are such that you need to play more regularly to keep on top of them.

I would also love to try it with multiple players. I can foresee issues with downtime, because not every hero activates every turn, and I do wonder if that might not kill the game as a group activity, but I guess  that depends on how social your gaming sessions are too.
Tuesday 3 October 2023

Somewhere in Northwest Europe, 1986 (Thunderbolt/Apache Leader)

 After the Thrappled Lemmings defeated the cult, I thought I should play something different as a palate cleanser. So, I dug out Thunderbolt/Apache Leader and let my megalomaniac wargamer tendencies loose by choosing the World War 3 North Atlantic scenario with the All Out War situation. That basically means that my squadron will be trying to hold back the red tide with a couple of sticks and an elastic band. Well, not quite but it certainly feels that way.

N.B. This brief AAR should be read with the Airwolf theme playing in the background.

My squadron comprises two A10 Thunderbolts and two AH64 Apaches. I saved a few points for repairs at the start and rather wish I had saved more because my dice rolls for the first two days have been terrible and my planes have far too many bullet holes in them. Worse yet, my pilots are quite quickly becoming fatigued and could well be unable to fly soon.

At the start of the campaign, there were several priority targets that I felt I needed to take out because they had special effects. Two of them reduced the amount of points I get each day for repairs and weaponry. The other increases the chance of enemy assault forces advancing. I took out one of the enemy battalions that penalised my points on the first day but failed to take out the enemy command that increases the chance of enemy assault forces advancing. I really cannot believe how many "anything but a 1" shots rolled 1s in that attack! Then there was the special condition that gave me an MLRS bombardment against the enemy battalion and would destroy units on an 8-10. Over 10 dice rolls and no enemy units were destroyed! But, enough about my dice rolls. As a result of my failures, I now have three enemy assault battalions sitting outside my air force base sucking up my resources. If those forces advance one more step, I am done. I cannot absorb the losses that would result from this.

So, day 3 of the war dawns and my pilots are on the edge of exhaustion. Nevertheless, they get up and get into their planes to do their duty. Whatever happens, they will not be remembered as betraying their comrades and their countrymen. Today, we try to take out the enemy command again. If we can slow their advance, we have a chance.

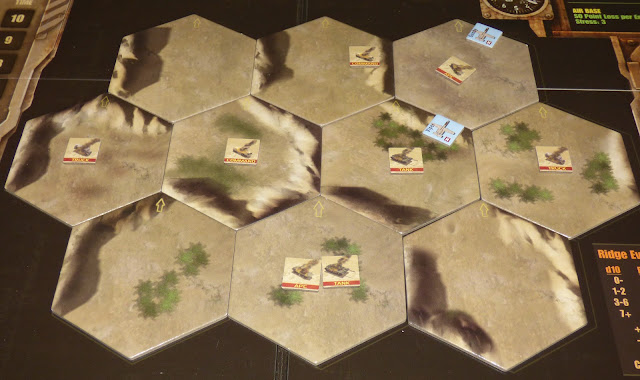
The first target is the enemy scout group. They give enemy assault units a bonus to advance, and I really need them not to have that if I am to survive another day. I assign two A10s to the task. They cruise through the enemy ranks in two smooth traverses and suddenly all that is left is smoking craters. One of the A10s has some bullet holes in it to add to the existing damage, but that is all. And this despite one of my pilots missing with every single Hellfire missile and having to fly slowly through the enemy using his cannon to take them out.

Viper and Gumby head home knowing they have done a great job

The second target is the enemy forward command. It prevents my pilots from destressing when they don't fly. I assign the AH64s to this one. My goal is to reduce the command to half strength so that its special effect does not apply. The AH64s start one on each side of the battlefield.

Rock (right) goes high while Shadow (left) goes low

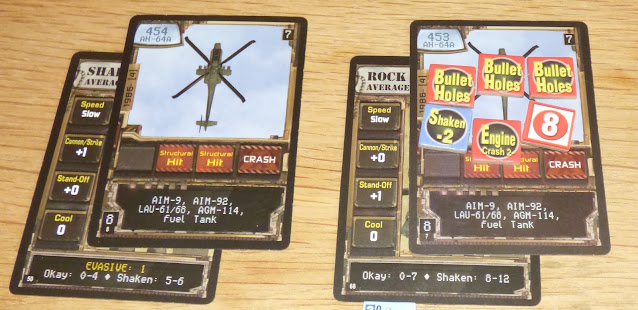
Command has mandated that one of them has to make a high approach. This makes it vulnerable to the enemy AAA Site and it quickly gains new holes in it. Fortunately, Rock is rock steady and holds it together. Taking aim carefully, he looses his LAU-68s (it's all I could afford!) at the enemy AAA and misses with every single one. Shadow, on the other hand, uses his cannons to good effect and leaves a trail of smoking SCUDS and AAA Sites behind him.The two pilots rendezvous over the main concentration of the enemy, only for Rock's Apache to gain more holes as an enemy helicopter appears.

Rock has been less than careful with his helicopter

Shadow takes it out but it's clearly time for Rock to skedaddle, assuming he can make it home. Shadow takes out one more SCUD and that is mission accomplished. The command is at half strength and the guys at the airbase can relax a bit.

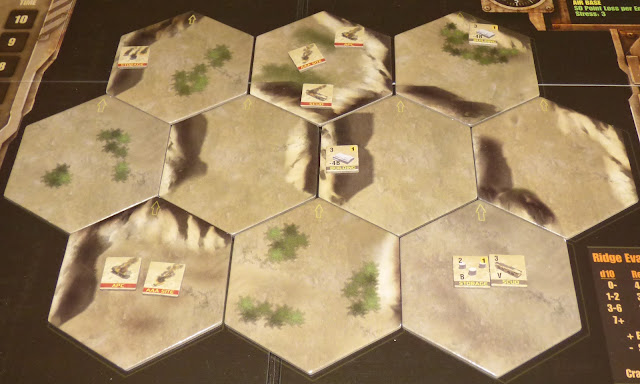
Just enough destroyed units to weaken the enemy command. Phew!

As the day ends, I find that Gumby has gone up a level from Average to Skilled as a result of his run through the enemy scout unit. Rock is a twitching wreck in the pilots' mess and will not be flying for quite a while now, but the other pilots are feeling a bit better and will be fine to stand in for him for a while.

Better yet, some enemy units are starting to retreat. Hitting the scout unit has had its effect. Unfortunately, my very last dice roll for moving enemy battalions sees one of them advance right up to my air base. Game over. I don't have enough resource points to compensate for that so I have lost.

I really like this game, despite this particular campaign being plagued by budget cuts and generals who buy their supplies from Honest Harry's Used Harriers ("Only one careful lady owner, guv, honest, and she only used it for shopping trips at weekends."), or crappy dice rolls as some others might call it. The key points for this campaign were failing to reduce the enemy units that had special effects early enough. I could have done it but just kept missing with my Hellfire missiles. It makes me wonder if I should have focused more aircraft on key targets early on, bought cheaper aircraft and swamped the enemy, or just bought new dice. I shall try all of these next time I play. What a great way to spend a couple of evenings.