Showing posts with label DVG. Show all posts

Saturday, 6 July 2024

Up Close and Personal in Africa (Warfighter)

 It's been a while, so I dug out Warfighter instead of working on the terrain I need for the next Rangers of Shadow Deep mission. I regret nothing! I picked the French as the friendlies and the African warlord hostiles. This is still my favourite pack because it has the "save the elephants" mission. I also quite enjoy the extra challenge of the hot environment, which can slow you down.

The commander had ordered Sergeant Capron to take his fire team and clear out the poachers from the area. Grabbing Corporal Durand, and Privates Swift and Bertrand, he proceeded to brief them. The enemy was massing in the area, so they would have a tought fight of it. Worse yet, they had a ways to go, so they would have to pack light. Loading up for close combat, the fire team headed out.

The mission is close combat, which means that all the hostiles will duck up in the same location as the foremost soldier. Many hostiles have other rules for placement, such as being placed in the objective location or behind the troops or some variant thereof, but this mission means getting up close and personal with the hostiles from the second you start the mission. The objective for this scenario is to clear the objective location of all hostiles. That means it is going to get messy.

The fire team was barely out of the gates of the base before hostiles showed up. Half a dozen gunmen leapt out of concealment but the team's superior training and firepower told. Despite being outnumbered, the hostile gunmen and RPG crews were soon suppressed and then killed by a combination of rifle fire and thrown grenades.

Although they would normally have been placed in the grassy fields location that was the first area to move through, because of the mission conditions, all the hostiles were placed in the mission card with the fire team the second I placed the first location. That was scary.

As the team advanced across the grassy fields and pastures of a nearby village, they were assaulted once more by hordes of gunmen. Once more they laid down as much fire as they could before moving into the village, where yet more gunmen and machine-gun teams waited to ambush them. The team were running short on grenades now, and the heat was taking its toll and slowing them down, but their objective was in sight. They only had to cross the village's farmland, ford a river and they would be there. The water of the river looked enticing at this distance as the drained their canteens and prepared to advance.

Once more, the hostiles threw themselves out of cover and tried to slaughter the team. Capron took a bullet in the shoulder, but shook it off.

"It's just a flesh wound," he announced. The others could see that it was slowing him down though.

The team pushed on to the river. It looks quiet but appearances can be desceptive. More hostiles emerged and rained firepower down on the team. Suddenly, an unseen ambusher leapt out and fired a burst at Bertrand. The plucky private died in the middle of the river. The others cut the ambusher down in a hail of lead and emerged on the objective.

An IED went off startling them all. Fortunately no one was hurt and Capron was able to lead the team round some very hungry-looking hippos into the objective where a group of villagers were gathered, drinking sweet tea, singing and arranging flowers. Apart from the singing and the disgruntled murmuring of the locals, there was no other sound, and there were no hostiles either.

Capron reported the objective clear and led his team back to base.

Well, that was a first. It was a hard fight all the way to the objective and then the objective points requirement was met by drawing three event cards and no hostiles. The IED suppressed my troops, I spent experience points to avoid the hungry hippos, and the local meeting did not require me to do anything because I was in the final location I needed to move into and had plenty of time. That meant I just advanced the timer and the mission was over. I have no idea why the local meeting was so heavily guarded or even if the two things were connected, but it made an interesting finish to the game.

In subsequent missions, Capron and his team took out a poacher stronghold, used a dust storm to sneak up on some poachers and drive them off from the elephants they were hunting, and defended a local village against hostiles. As the team was retreating from the village they had defended, the poachers massed in strength and pursued them. It was a hard fought battle even with the armoured support that had turned up. Unfortunately, Capron died within sight of the base gates, the bodies of his team strung out along the route back from the huts.

I played half a dozen more missions with the same two player soldiers and mostly the same squad soldiers after the mission written up here. All went well until the escape mission where the team had the misfortune of suddenly discovering that the hostiles had set up two heavy machine-gun nests outside their objective. Between that and the huge number of reinforcements that appeared, they were overwhelmed and Capron was cut down one card away from his objective. It was a TPK. A sad end to a good series of games and my worst result yet in this game. On the other hand, if I won every time the game would get boring. I guess I can always run a rescue mission to free Capron, who, it unexpectedly turns out, was only wounded and was captured by the poachers.

I really do like how Warfighter generates interesting narratives through the play of the cards. Of course, I try to help it along by playing thematically appropriate locations too, rather than just looking at which locations offer the best advantage for me, but the random draws add an extra dimension to the stories that my soldiers will tell afterwards. Cracking good stuff that makes me feel like I am a movie action hero for a wee while!

Tuesday, 3 October 2023

Somewhere in Northwest Europe, 1986 (Thunderbolt/Apache Leader)

 After the Thrappled Lemmings defeated the cult, I thought I should play something different as a palate cleanser. So, I dug out Thunderbolt/Apache Leader and let my megalomaniac wargamer tendencies loose by choosing the World War 3 North Atlantic scenario with the All Out War situation. That basically means that my squadron will be trying to hold back the red tide with a couple of sticks and an elastic band. Well, not quite but it certainly feels that way.

N.B. This brief AAR should be read with the Airwolf theme playing in the background.

My squadron comprises two A10 Thunderbolts and two AH64 Apaches. I saved a few points for repairs at the start and rather wish I had saved more because my dice rolls for the first two days have been terrible and my planes have far too many bullet holes in them. Worse yet, my pilots are quite quickly becoming fatigued and could well be unable to fly soon.

At the start of the campaign, there were several priority targets that I felt I needed to take out because they had special effects. Two of them reduced the amount of points I get each day for repairs and weaponry. The other increases the chance of enemy assault forces advancing. I took out one of the enemy battalions that penalised my points on the first day but failed to take out the enemy command that increases the chance of enemy assault forces advancing. I really cannot believe how many "anything but a 1" shots rolled 1s in that attack! Then there was the special condition that gave me an MLRS bombardment against the enemy battalion and would destroy units on an 8-10. Over 10 dice rolls and no enemy units were destroyed! But, enough about my dice rolls. As a result of my failures, I now have three enemy assault battalions sitting outside my air force base sucking up my resources. If those forces advance one more step, I am done. I cannot absorb the losses that would result from this.

So, day 3 of the war dawns and my pilots are on the edge of exhaustion. Nevertheless, they get up and get into their planes to do their duty. Whatever happens, they will not be remembered as betraying their comrades and their countrymen. Today, we try to take out the enemy command again. If we can slow their advance, we have a chance.

The first target is the enemy scout group. They give enemy assault units a bonus to advance, and I really need them not to have that if I am to survive another day. I assign two A10s to the task. They cruise through the enemy ranks in two smooth traverses and suddenly all that is left is smoking craters. One of the A10s has some bullet holes in it to add to the existing damage, but that is all. And this despite one of my pilots missing with every single Hellfire missile and having to fly slowly through the enemy using his cannon to take them out.

Viper and Gumby head home knowing they have done a great job

The second target is the enemy forward command. It prevents my pilots from destressing when they don't fly. I assign the AH64s to this one. My goal is to reduce the command to half strength so that its special effect does not apply. The AH64s start one on each side of the battlefield.

Rock (right) goes high while Shadow (left) goes low

Command has mandated that one of them has to make a high approach. This makes it vulnerable to the enemy AAA Site and it quickly gains new holes in it. Fortunately, Rock is rock steady and holds it together. Taking aim carefully, he looses his LAU-68s (it's all I could afford!) at the enemy AAA and misses with every single one. Shadow, on the other hand, uses his cannons to good effect and leaves a trail of smoking SCUDS and AAA Sites behind him.The two pilots rendezvous over the main concentration of the enemy, only for Rock's Apache to gain more holes as an enemy helicopter appears.

Rock has been less than careful with his helicopter

Shadow takes it out but it's clearly time for Rock to skedaddle, assuming he can make it home. Shadow takes out one more SCUD and that is mission accomplished. The command is at half strength and the guys at the airbase can relax a bit.

Just enough destroyed units to weaken the enemy command. Phew!

As the day ends, I find that Gumby has gone up a level from Average to Skilled as a result of his run through the enemy scout unit. Rock is a twitching wreck in the pilots' mess and will not be flying for quite a while now, but the other pilots are feeling a bit better and will be fine to stand in for him for a while.

Better yet, some enemy units are starting to retreat. Hitting the scout unit has had its effect. Unfortunately, my very last dice roll for moving enemy battalions sees one of them advance right up to my air base. Game over. I don't have enough resource points to compensate for that so I have lost.

I really like this game, despite this particular campaign being plagued by budget cuts and generals who buy their supplies from Honest Harry's Used Harriers ("Only one careful lady owner, guv, honest, and she only used it for shopping trips at weekends."), or crappy dice rolls as some others might call it. The key points for this campaign were failing to reduce the enemy units that had special effects early enough. I could have done it but just kept missing with my Hellfire missiles. It makes me wonder if I should have focused more aircraft on key targets early on, bought cheaper aircraft and swamped the enemy, or just bought new dice. I shall try all of these next time I play. What a great way to spend a couple of evenings.

Tuesday, 15 November 2022

'Warfighter: The Tactical Special Forces Card Game' from Dan Verssen Games: Some further thoughts

 I've played a couple of dozen games of Warfighter now, both on VASSAL and physically. So, it's time to follow up my previous reports with a few more thoughts. These are based on the content of the VASSAL module which you can buy direct from DVG and on the core module with a few expansions that I bought.


The VASSAL module

The VASSAL module includes the core game and expansions 1-47. That is a lot of content, but not everything released for the game at the time of writing. I am fairly sure that the additional expansions will be released as mods for the VASSAL module, but I have no idea when that will be.

Even though it states expansions 1-47, it does not include 47 expansions, because the Warfighter expansions in that series include the Warfighter: Shadow War and Warfighter PMC core games plus expansions for them. It's still a good lot of content though and offers plenty of options for your games.

One issue I found with the VASSAL module was that one of the Eastern European missions had the wrong card image, so I could not play it on VASSAL, because you need to be able to reference those images. I wrote to DVG about whether that mod would be updated but have not heard back. There might be other issues with the cards in the mods but I have not found those yet.

The VASSAL module is good and lets you get started playing with a wide variety of forces for player squads and adversaries. It is consistent in form, so you do not need to worry about differences in cards (more on this in the physical game below) and it includes the rules as part of the VASSAL module as well as two scenario books that set out missions with specific forces and objectives. I have not tried the scenario books, so cannot commment on them.

Using the VASSAL module is simple, so the game is easy to play with no need to spend time digging out the cards and setting up a playing area. As the whole set-up is consistent, whether or not it conforms to the most recent errata or not, there are no issues with sorting out the cards as I discuss for the physical game. My only issue with it is that I could do with a larger monitor than my current 27" one, so I do not have to scroll or zoom to get to different parts of the game board

When I bought the Modern VASSAL module, I also got the WW2 module. I am glad I started with the VASSAL modules. They gave me a good feel for the game at a decent price and showed me that I preferred the Modern version.

Warfighter 4th Edition

The core Modern game comes with US soldiers and equipment, Middle Eastern insurgent and military adversaries, and Jungle Cartel adversaries, plus the appropriate locations, counters, rules, board, one scenario book. This is all entirely playable out of the box.


The 4th edition also includes all the latest card updates. These have happened along the way as the game has developed and expanded to the point where there is an upgrade pack containing 360 cards for those with earlier versions of the game. If you are only going to play the 4th edition core game, you don't need the upgrade pack.

The upgrade pack also includes cards for the first nine expansions, which were released before the changes to the game. You simply swap out cards with the same name for those cards in the upgrade pack. It is fairly simple to do this, although it gets confusing because the card numbers are often not the same and there are a lot of questions about just this on the BGG forum, so it is not just me getting confused. Some of these expansions have been upgraded to the new cards, but others have not. When I bought my copies, I found I had a mix of the two. This will depend upon stock at the place you buy the game and when they got it in.

I'm glad I got the upgrade pack because of this, but it is also useful because having duplicate or triplicate cards for the equipment makes it easier to remember who is carrying what.

The issue comes when some of the cards ostensibly depicting the same equipment have been upgraded further. My 4th edition core game came with a MOLLE card that lets my troops carry more stuff, but the cost was more than in the other set this card came in, and I was not sure which was correct. Referencing the VASSAL module, I was given one stat set, but when I checked on the BGG forum, I realised the VASSAL version was out of date. Not a problem when it is consistent within the set, but confusing when putting together various expansions.

Another issue I have found was that the core game is meant to come with two of the MOLLE card but I only received one. I need to contact DVG customer service about this. In the meantime, I have printed out the version of the MOLLE that I am using and have pasted it onto the older version of the card so that my set is consistent.

My final issue to mention here is with the Australian set I bought. You get two copies of the AUG F88 rifle, but each of my two copies had different long range stats on them. I found out which was correct on the BGG group very quickly and also learned that the suppressed version, for which you only get one card, also had the wrong stats. It's a bit frustrating that these errors are present when you pay good money for these things, but I have pasted the correct stats onto the card, so it is not a total loss. I'll be copying and pasting the most up-to-date versions of the stats onto any other cards with similar errors. It's not elegant but it does the job. One other thing I have done is to copy and paste the most commonly used weapons (in my case grenades) onto spare weapons cards, so that I have enough to go around. This is a good way to use the cards that have been removed from the set for being outdated.

The Verdict

It really is a fun game and a lot more interesting than I initially thought when I first read about it. Each game plays out like scenes from a movie and the sorts of tactics that I feel ought to work in real life do work in the game, as long as the dice do not mess things up for you. Playing a series of games with the same soldiers can result in you getting attached to them, and it gets to feel like a role-playing game at times.

Overall, the physical game wins out despite the slight irritations. I spend all day at work using a computer screen and don't particularly want to stare at one in my downtime too. Shuffling and moving the physical components is also a large part of my preferred gaming experience, and is far superior to clicking and dragging. That said, getting the computer to do the shuffling for you certainly does save on picking up the cards from the floor when I drop them. That happens all too often these days!

The actual physical components feel sturdy and good quality. The downside of the physical game is the footprint on the table. You'll likely use a large part of the typical dining table to get set up, although people do suggest ways of reducing the game's footprints, such as card holders that keep your cards upright.

There are a lot of expansions for the game. You get a large number of them in the VASSAL module and it would cost a fair bit of money to match that in the physical version. That said, you don't need all of them to play. There is a good game to be played right out of the box. I don't see me buying every expansion, simply because not all are of interest, but I could certainly be tempted by a few more, and adversaries packs that control the opposing force are more likely to tempt me than more nations ... well, unless they add the Norwegian army ...

With all this in mind, I very much hope that they get around to the Near Future/Cyberpunk version soon. I would love to use this system to build and run a cyberpunk gang, hacking my way past security and running extremely hostile corporate takeovers.

Thursday, 10 November 2022

A Walk in the Light Green 10: Take 'Em Out (Warfighter campaign)

 This Warfighter campaign uses the Warfighter Modern Australian pack as the player side and African Warlords packs 1 and 2 for the adversaries and missions. This is the tenth and final game in the campaign. Click here to read the previous game.

So, I started trying to write this in the style of Jerry Ahern's Survivalist novels because I thought it would be fun and it felt nostalgic as I had read a few of them in the eighties. I gave up. This post would have been ten times the length it currently is. Enjoy the first part, just the same, and please forgive me for not describing the weapons, bullet weights and muzzle velocities in more detail! I promise to attempt more brand-aware game reports another time.

"Gray, we got them on the ropes. Here's the target package for the last of the poachers in this area. Time to take 'em out. You've done a great job so far and I'm giving you all the resources available. Pull this off and you can get some R&R. Take Ross with you and show him the ropes. He'll be taking over from you while you're opening tinnies on the beach back home."

Gray looked through the package briefly, saluted and left. Time to gather his team and brief them. Ross was a fire-eater with a good track record in other theatres but relatively new in Bwendi. Chances were he would be a good replacement for Gray though. The rest of the team knew Gray from previous missions and they had worked together well throughout the current campaign. Gray laid out the mission for them.

It was going to be a long trek in the heat, so they would not be able to pack much in, but they could expect a parachute drop of supplies half way to the poacher's camp. That should help them restock and make the final push. It also meant they did not need to conserve ammo in the first half of the mission. With the team briefed, they moved out.

Cradling the weight of his SIG MCX lightly in his arms, Gray ordered Reid to take point. The experienced soldier had good eyes and was packing enough grenades to start a fireworks show.

"Hippos," muttered Reid, "Why did it have to be hippos?"

The river ahead was devoid of cover, and surrounded by open fields. A civilian caravan was passing nearby. Not a lot the team could do other than hope they did not alert the poachers further down the route. Worse yet, hippos were enjoying the cool water of the river. Reid directed the team around the hippos to a safer crossing point. Safer merely meant that the team had the drop on the poachers lounging near it. A group of guards were chilling with their feet in the water. A nervous kid looking uncomfortable with the 4kg weight of his AK was near them. More worrying were the gunman and his crew who looked experienced and watchful.

Reid pressed forward on his belly through what little cover there was. As soon as he was close enough, he threw an F1 grenade at the gunman. 30g of RDX detonated, sending metal shards flying at lethal speeds through the gunman and one of his crew. The other fled as fast as he could.

Evans, following Reid in, lobbed another F1 at the gunmen chilling by the water. One of them disappeared into the water in a spray of blood and flesh. He would be food for the hippos soon enough. The other froze just long enough for several 5.56x45mm NATO rounds to rip through him as the whole team opened up.

The kid rabbited, dropping his AK behind him in his haste to get away.

The team secured the area quickly and began to cross the river. As they did so, two more poachers emerged from the brush. Ross detonated the Claymore he had deployed as soon as he was over the river. Around 700 steel ball bearings shredded the brush and two of the poachers at around 1200 metres per second. The hippos were going to have to drink these guys. The other was wounded and ducked into cover. Gray gave the order to smoke him out.

A blast of 5.56mm rounds soon put paid to the guy, but a jumpy looking guy leapt out of ambush at the same time, only to fall to another hail of hot lead, just as Gray had got the team ready to move out. Ahead lay some of the traditional Bwendi domed huts. The team moved in and suddenly found that the area was hot. Gray cursed.

"Damned caravan must have warned them."

Then there was a sudden explosion. A local meeting erupted into chaos as someone had clearly goofed in priming their bombs. People ran in every direction as the team moved in. Unfortunately, the poachers stationed here looked looked like a main force with leadership and they were dug in. Gray called in the drone. The officer and his crew disappeared in a pink mist as the bombs scored a direct hit. The chopper's minigun put paid to another squad of hostiles as hundreds of rounds of 7.62mm bullets tore through them in a classic case of peace through superior firepower.

Under cover of the noise of the explosions and the dust from them, the team moved in, throwing grenades and firing long bursts until the only noise left in this village was a the ringing in their ears.

"Right, let's move on before those locals warn anyone else," Gray commanded and got his team ready to move on.

Unfortunately, the grassy fields beyond the huts were heaving with heavily armed poachers. Reid took point again, throwing a grenade at a group of riflemen idling on the edge of the corn, causing them to get their heads down. He followed up with a grenade at a group of inexperienced riflemen who were bunched closely enough together to make them too tempting a target. Evans followed closely behind him and dropped a grenade on a machinegun team that slowed them down enough for Gray to move in, fire a burst of 5.56mm that shut them down for good, and then called in the drone once more to drop a heavy load of high explosive on a more experienced looking group of riflemen. Pearce, Rogers and Ross followed closely behind as Gray took out a hostile with an RPG who had just popped up, and their combined fire cleared the way across the field.

The men were sweating and their mouths dry, but they needed to keep moving to hit their target. Time was running out but they were functioning well as a team despite the heat, and they were nearly at the supply drop. Good job too, because they had used up all their F1 grenades and were going to need a case or two of 5.56mm ammo to keep them going.

The rocky lake that was the RV for the supply drop lay ahead of them. The midday sun burned down. Unfortunately, there was little time to stare into the water and contemplate their place in the universe, because the poachers were dug in around the lake. Two machine-gun teams, a sniper and a bunch of riflemen were waiting. Fortunately, the team had remained unseen so far. Gray gave the order.

"Rapid fire! Take the bastards out!"

A hail of copper-jacketed lead streaked towards the hostiles, as the drone dropped high explosive on the machine-gun cart and those with grenades left ensured that the poachers were fed as much RDX as they could stomach. In short order, the drop zone was secured and Gray called it in. The team resupplied, filled their canteens from the lake and prepared to head out on the second leg of their mission.

The hot plains beyond the lake were a massive contrast to the cool waters of the lake. The soldiers cursed the heat and licked dry lips. Their only consolation was that the hostiles were obviously no fans of the heat either. Those few hostiles who were out in the heat were not paying attention and it was a simple matter to rain lead on them until the heat ceased to bother them.

The river ahead looked like a place of refuge, but it was not to be. The hostiles were here in force. Worse yet, it looked like a prepared position. Reid, on point, spotted and IED and led the team around it, but things could have been bad there. Once more the heavy weapons were out. Reid pointed out to the rest of the team an RPG gunner and a dozen riflemen all looking menacing. Ross let rip a burst of high velocity lead and the RPG gunner dropped where he stood. Pearce lobbed an F1 at a group of gunmen, killing one and suppressing the rest. He followed up with a burst that killed another hostile. Rogers dropped a long rifleman with a well aimed burst and several of the other riflemen fled into the bush. The sight of their fellow being felled was too much for them. The remaining poachers were quickly disposed of with a combination of grenades and rifle fire.

Gray and his team paused to regroup and prepared to move on. They crossed the river carefully, dodging around a more professional-looking than usual group of poachers. Suddenly an ambusher ducked up. Ross sent several hundred ball bearings his way as he triggered the Claymore that he had set up as they secured their perimeter. The ambusher disappeared in a spray of blood. As they moved out of their crossing point, more riflemen could be seen. Evans and Reid threw F1s at them and the fragmenting casings shredded several of the poachers. The whole team then opened up with their rifles and filled the air with lead. This proved unhealthy for the remaining poachers. However, the team could see a hostile patrol approaching. Their objective was in sight though. Not long until they got their, although the obvious heavy machinegun emplacement was ominous.


Once across the river, the team had to make their way through a large village. Reid immediately spotted three RPG teams as well as sundry other riflemen. The enemy patrol had reached here too, so it was clearly time to dig out the big guns. Ross radioed battalion and got access to a mortar stonk that vapourised several of the riflemen and made the remaining one keep his head down. Gray brought the drone in and one of the RPG teams disappeared amid the dust and fire of a missile strike. A sniper from battalion dropped another rifleman. With two careful bursts, Gray neutralised two RPG teams and ordered his men into the village. The overwhelming firepower of the Aussie team quickly neutralised the rest of the hostiles, although they were now running low on grenades. Unfortunately, they were now in range of the heavy machinegun. A burst of heavy fire tagged Reid, who was on point. He was still mobile, but was slowed down now.

It was obvious that the team was now approaching the poachers' main camp and that the poachers were desperate. There were no fewer than three machinegun nests, an RPG gunner and one group of dug-in riflemen in the grassy plains before the objective. Ross called for mortar fire again, killing one machinegunner and wounding his assistant. The sniper took out another gunner, and the drone destroyed the machinegun nest on the objective. With most of the hostiles suppressed, the troops moved in and sprayed 5.56mm rounds on the enemy. Soon, none were standing and the team were preparing to move on the objective.

By now, the heat was really telling and the team were flagging. Only Gray and Ross seemed to be fully acclimated. The poacher camp ahead was heaving with hostiles. Gray cursed as he saw the guard hippos too.

"What is it with these damned hippos everywhere?" he muttered as he directed his team around them.

Ross called up the mortar one more time. The poachers' officer and his crew disappeared in a pink mist. The sniper's rifle cracked and a gunman fell. Gray called down another mortar strike and took out half of the machinegun crew. Reid moved into the objective first. His grenade made a bunch of gunmen keep their heads down and he took out two dug-in riflemen at close range with his rifle. They never even saw him coming. Evans closed in next and neutralised two groups of hostiles with his F1 grenades. Ross followed up next and quickly took out the last of the machinegun crew with a single shot to the head. The rest of the squad followed in short order and blasted everything that was moving until it stopped. As the dust cleared, they realised they had taken the poachers' camp.

Gray radioed in and called for extraction. The poachers would not bother this area of Bwendi again, although he doubted that was the end of the problem. Many of them would move quickly enough elsewhere, but that was a problem for the the top brass. He was heading home for a few tinnies by the beach with a satisfying sense of having done his job well.

Reid got wounded again, but Gray got him out of there, so he will just have more scars to impress his beloved with. Luckily, Ross drew the Shake It Off card straight after, so he could heal the wound and return Reid to fighting fitness there and then.

  • + 11 VPs = 64 VPs. That's a solid strategic victory. Gray has won the campaign and driven the poachers out of the mission area.
With the campaign won, time for some reflection. I think I am down with the rules now and made few, if any, mistakes. The most difficult part is keeping track of where I am up to in the turn and making sure I work through it methodically. With the team I had, and recruiting an extra player soldier, this final mission felt unchallenging, although I am certain it would have got challenging if I had stopped thinking hard about where to attack and ensuring that the enemy were suppressed at all times. The fact that Reid got wounded is proof of that. I forgot I had moved into range of the heavy machinegun and Reid paid the price.

I have thoroughly enjoyed these forays into Warfighter. The game requires focus, some decent decision making and a bit of luck, which is really a good combination. Your decisions are meaningful and a moment's carelessness can cost you. The only negative point is the need to sort through the supplements to make sure you have the right versions of the cards. I noticed a couple of cards in the action deck that were wrong, but the numbers suggested they were from the update kit I bought, so I need to go back through all the spare cards and see if I have included in my action deck cards that should have been removed. That's fine though. I'm still convinced that my main hobby is organising my games and their storage rather than playing them.

So, with campaign over, I'm not sure whether to start another campaign or to play something else next. We'll see.

Sunday, 30 October 2022

A Walk in the Light Green 9: Eliminate the threat

This Warfighter campaign uses the Warfighter Modern Australian pack as the player side and African Warlords packs 1 and 2 for the adversaries and missions. This is the ninth game in the campaign. Click here to read the previous game.

Well, this has taken long enough to write up. I played this game over a month ago, but have since had a lot of family stuff to sort out, so it has languished in note form until now. Hopefully, I shall get the next scenario played and written up over the next week or so, now that things are returning back to whatever passes for normal these days.

"Time to take it to the poachers, Gray. I'm chucking all the resources at you for this, so don't fuck it up."

Gray looked over the mission brief. He had drone support, an attack helicopter and the whole squad for this one. It was going to be a hefty hike into the brush, but he reckoned they would be alright as long as they could dodge the damn hippos that were everywhere out here. If the poachers had gone for hippos instead of elephants, he was sure that his team would not have been deployed here in the first place because everyone seemed heartily sick of the damn things.

Still, even with all that support, he could not afford to relax. The team moved out and quickly encountered hostiles in Tempey village near the base. A brief firefight ensued and the hostiles were neutralised. Moving on through a local goat farm to a village by the river and then on to a smaller village and some rural housing on the other side, the team worked slowly and methodically to elimate the poachers as they went. It was a job that required them to stay focused as they moved through the various built-up areas.

The open plains beyond the housing were dangerous, but the air support helped a lot and the team were able to keep moving despite Reid taking a bullet in the leg that slowed him down. Then they navigated their way through a maze of huts that was also the feeding grounds of a bunch of hippos. I mean, what kind of person would make their home where hippos roamed?

Then it was on to the parched and baked plains beyond. The heat took its toll, but Gray kept the team motivated and they were able to move out quickly as a unit to their objective: the poachers' main camp. The team moved in. A combination of drone strikes, air support and grenades soon neutralised the whole camp, and the team were able to return home quickly with the sense of satisfaction that a job well done gives.

This time it was Reid that got wounded, but not too seriously. The team retained initiative throughout the mission, which made it easier to avoid getting shot at, and I rolled well for the heat, so they were not slowed down too much by that. Reid's wound can be attributed to too many soldiers suffering from the heat on one turn, but other than that, it was all good.

There is one more mission in the campaign. I hope that Gray can keep his shit together long enough to finish that final mission and go home for some well-deserved R&R.

  • + 10 VPs = 54 VPs. This is currently a strategic victory. As long as Gray does not die next scenario, I reckon I can count this as won and the poachers driven out of the area.
  • + 10 Mission Points. With 2 left over from last time, Gray has 12 MPs to spend. I buy him Hydrated, which means he can spend XPs to retain Hardy tokens, representing his better management of his fluid intake. I justify it to myself by noting that he is almost at the end of a tour of duty in a hot environment and must have learnt something along the way. I also buy Zeroed, which improves his chances of hitting and killing hostiles. After all, he is now a highly experienced combat veteran.

Mission Adjustments:

  1. -1 Mission Time. I get one turn fewer in which to accomplish my goals again. That means the final mission will be 2 turns shorter.
  2. +2 Locations.
  3. +3 Skill Cost
  4. -2 Loadout

Tuesday, 27 September 2022

A Walk in the Light Green 8: Hold the Town

This Warfighter campaign uses the Warfighter Modern Australian pack as the player side and African Warlords packs 1 and 2 for the adversaries and missions. This is the eighth game in the campaign. Click here to read the previous game.

"The poachers are getting desperate, Gray. They are assaulting Moatoaa Town. Take your team and sort the situation out. I'm giving you some armoured support for this one. Don't break it."

Another day, another patrol through burning wastes. The reason why the current base was here was that the area was nigh on uninhabitable for humans, so no one had set up here before. The lizards seemed to love it. And Gray was going to have to march out of there. The map showed a grim route for humans. The team set out across the hot plains around the base. There were few hostiles on the plains, but things got hot round a nearby river. Fortunately, there were no restrictions on engagement. Gray booked in for drone support. That would even the score a bit along the way.

They swept aside a few more hostiles as they crossed the desert, climbed through the hills and onto the plains beyond. From here, they could see the outskirts of the city. Scattered houses and open fields made this approach dangerous and Harper took a bullet here. He was not badly hurt but it slowed him down.

An explosion rocked the village ahead. The armoured support must have hit an ammo dump. That discouraged the hostiles from coming in there, but the goat farm beyond that was still defended.


The team just put their heads down and worked methodically towards their goal. Soon they were in the town. Picking their shots, they soon took out the hostiles occupying the town, and radioed that the place was clear for the support team to move in and consolidate this gain.

Harper copped one again, but he will recover. Another solid success although time was tight by the end of this game. The extra two locations to move through and the heat really slowed the team down. It felt like about half the team was suffering reduced numbers of actions because of the heat at any one time. I really like having the drone support. It's quite effective in this situation where there are not too many locations where collateral damage is an issue. The situation is interesting too. The hostiles are generally not that hard to deal with (with some notable exceptions) but the environment slows you down a lot. This differs from the Eastern Europeans where there are some seriously dangerous hostiles that are hard to deal with, but you don't get slowed by the environment.

  • + 10 VPs = 44 VPs. Even if the campaign ends next scenario, Gray has done really well.
  • + 10 Mission Points. I bought Gray the Veteran skill. I think he has earned it now.

Mission Adjustments:

  1. -1 Mission Time. I get one turn fewer in which to accomplish my goals from now on. With the increased locations, this means longer missions but less time to complete them in
  2. +2 Locations.
  3. +3 Skill Cost
  4. -2 Loadout

Monday, 26 September 2022

A Walk in the Light Green 7: Overwhelmed

This Warfighter campaign uses the Warfighter Modern Australian pack as the player side and African Warlords packs 1 and 2 for the adversaries and missions. This is the seventh game in the campaign. Click here to read the previous game. 

The patrol had gone well but suddenly the area was swarming with poachers. Gray cursed. Then he cursed again when he saw the dust storm coming in.

"Ok, troops, we gotta get outta here. The dust storm will be unpleasant, but at least it will give us some cover. Move out!"

This is an escape mission, which means Gray needs to get from the objective card on the right to the mission card on the left. When his team reaches there, they have won. Hostiles will be generated along the way, but many will also be generated behind Gray and will be chasing him. The dust storm provides cover and means that all attacks have to be made at point-blank range. No snipers in this mission. The other disadvantage is that the mission has a loadout penalty of 6 which is added to the 2 points from the mission adjustments. That means that Gray can barely carry his rifle and ammo, and will have little else with him. Of course, wearing a MOLLE in this situation helps.

The men grabbed what gear they could and set off through a maze of huts on the outskirts of a rural town. The place was heaving with hostiles and more were chasing them from behind. Fortunately, Gray was rapidly becoming a good leader and they were a good team. Working together, they neutralised the hostiles as fast as they could, barely stopping in the process. The hostiles from the objective were always moving towards them though, so there was no time to rest.

The heat was bad. The team struggled to focus on their task. Their shots were pure instinct as the sweat poured into their eyes.


The cover of the houses on the outskirts of town was a blessed relief, as was the rocky lake beyond it. had not time to really enjoy the shade and cool water before they were moving on again. Unexpectedly, a machine-gun team opened up from close buy. Harper yelled as bullets ripped into him. He was lucky to be alive, but he was not going to be much use from now on. His mates half.dragged, half-pulled him down the sun.baked road, barely able to stand in this heat themselves. Then they repeated the process across the hot plains beyond to the camp.

With only a few rounds left each, the team piled into the shelter of their camp, and the enemy gave up the chase. They had lived to drink a few tinnies again.

Well, Harper copped one but we got him back to base. No fatalities makes this another victory.

  • + 8 VPs = 34 VPs. Gray is well on his way to actually stopping this gang of poachers.
  • + 8 Mission Points. I bought Gray the Shooter skill to make him more effective with his rifle.

Mission Adjustments:

  1. +1 Location. All future missions will require the team to move through an additional location card to get to the objective. with the previous +1 location, that means each mission is now 2 locations longer.
  2. +3 Skill Cost
  3. -2 Loadout

Sunday, 25 September 2022

A Walk in the Light Green 6: Hold the Huts

  This Warfighter campaign uses the Warfighter Modern Australian pack as the player side and African Warlords packs 1 and 2 for the adversaries and missions. This is the sixth game in the campaign. Click here to read the previous game.

"Gray, your mission, is to move out to Belengo Village and stop the poachers moving in there. We expect heavy and active assaults by the enemy, so be prepared."

Gray gathered his team and briefed them. They seemed relieved for a change. Apparently, sheltering in huts while shooting hostiles appealed to them more than marching across blasted hot tracts of land while shooting hostiles.

Unbeknown to Gray and high command, the poachers were trying to make Belengo Village into their new base. The hostiles would be up close and personal as the men patrolled to the village.

In game terms, the mission would involve placing any newly generated hostiles in the same location as the soldier closest to the objective. This could get tricky, if reinforcements were generated, because it was likely that the team would not be able to neutralise them before they could fire.


As the team advanced on a nearby village by a river, the village was rocked by an explosion. Ducking down, the team made their way slowly into the village, engaged them and neutralised them. The explosion seemed to have discouraged other poachers from getting closer though, so that was a blessing.

Moving on, the team entered a village where the grateful locals mobbed them and plied them with fizzy drinks, after the hostiles had been driven off. This did delay the team but they needed the break.

The delay is represented by moving the objective one location further away, so the team will need to move through an additional location, adding at least one turn to the time it will take to complete the mission.

The tins of drink came in handy as the next stage of the patrol was across a dusty, dry plain and they needed several of the tins to keep going. Fortunately, the plains gave way to low hills and the men could take a brief respite from the heat, while contemplating the futility of their existence in a rocky lake.

Then they moved out and occupied Belengo Village. There were hostiles already there, but a few grenades saw them off, and the reinforcements were swiftly discouraged by heavy fire and more grenades. Mission accomplished.

Another mission with no casualties! I also like how the location cards seem to tell the story of the journey for me.

  • +6 VPs = 26 VPs. Very nice.
  • +6 Mission Points. I bought Gray the Operator skill. It increases the number of cards he can have, which will make the larger missions easier for him to command.

Mission Adjustments:

  1. +1 Location. All future missions will require the team to move through an additional location card to get to the objective
  2. +3 Skill Cost
  3. -2 Loadout

A Walk in the Light Green 5: Topple the Citadel

 This Warfighter campaign uses the Warfighter Modern Australian pack as the player side and African Warlords packs 1 and 2 for the adversaries and missions. This is the fifth game in the campaign. Click here to read the previous game.

"Hey, Gray, you're not up to much lately and you're good with explosives. Take a team and destroy that poachers' citadel."

Gray nodded and went to collect his team. As usual, they were unimpressed by the thought of a walk in the mid-day sun, especially when it was lasagne and fries for dinner, and they might miss it as a result of this patrol.

The team geared up, put on their sunscreen and headed out. The heat was merciless and they had to take frequent rest breaks, making the patrol even slower.


Gray led the charge into a large village and they blasted aside the defenders. Taking point again, he advanced into the outskirts of the village next to the river and blasted aside the heavy defence there. The poachers were very clearly based in the area and this village was both hot and full of non-combatants that they had to be careful about injuring.

After clearing out the hostiles, there was some respite from the heat as they crossed a nearby river, although the hostiles on the banks tried to make it hot for them. A bigger problem were the hippos in the river around the citadel. These were truly hungry, hungry hippos. Gray wondered idly if their presence was deliberate on the part of the poachers or just a coincidence. Still, he was experienced enough to spot a route past the hippos without any of his men winding up on the wrong side of a hippo. That would be the inside, in case you were wondering.

The defenders of the citadel were fairly easy to deal with and Gray deployed explosives around the place, razing it to the ground. Mission complete, and they would still get back to camp in time for dinner.

Another mission with no casualties, which is nice and even the random events seem not cause the team too many problems. Having a hippo guard at the citadel did make me chuckle though. Sounds like the kind of thing I would do if I were a warlord of some description.

  • +5 VPs = 20 VPs. Gray is really making a difference here now.
  • +5 Mission Points. I bought Gray the Point Blank skill to make him more effective when up close and personal with the enemy.

Mission Adjustments:

  1. +1 Skill Cost cumulative with the previous increase, so skills now cost +3 points.
  2. -2 Loadout

A Walk in the Light Green 4: The Warlord's Encampment

  This Warfighter campaign uses the Warfighter Modern Australian pack as the player side and African Warlords packs 1 and 2 for the adversaries and missions. This is the fourth game in the campaign. Click here to read the previous game.

"Congratulations on destroying the fortress, Gray. I need you to take out the warlord's encampment near the elephant reserve. Poachers are gathering there, and you need to scatter them. You'll be working with a local guide here. He's going to ensure you get there without getting lost. Good luck."

Gray and the team had their orders. They picked up the guide and headed out into the heat once more.


Following the trail across the hot plains, the team drove off gunmen and emerged into the relative cool of the fields near the encampment. Turns out that those fields were hot too, and they had to be careful to avoid civilian casualties there, so they picked their targets and hunkered down in whatever cover they could find.

What is a heavy military presence doing the Agriculture Zone? I don't know but it complicated things a bit because you are not allowed to use weapons that can hit multiple targets in it so the guys had to switch to single shot.

Beyond the fields, lay a stronghold. They could see the warlord's camp beyond that. Fortunately, the stronghold was not somewhere they had to be. Grenades and auto fire burned through their ammo but took out the guards. Then it was on to the encampment. Once more, grenades and auto fire cleared a path, and Gray was able to lay the charges and blow the place to pieces. Job done. No one hurt. Time to go home.

Another mission with no casualties is always a bonus and this campaign is going nicely so far.

+5 VPs = 15 VPs. Nice.

+5 Mission Points. I bought Gray the Squad Leader skill. It seemed appropriate given that he is successfully leading teams.

Mission Adjustments: +1 Skill Cost cumulative with the previous increase, so skills now cost +2 points.

-2 Loadout

A Walk in the Light Green 3: Fortress Destruction (Warfighter in Africa)

 This Warfighter campaign uses the Warfighter Modern Australian pack as the player side and African Warlords packs 1 and 2 for the adversaries and missions. This is the third game in the campaign. Click here to read the previous game.

"We've worked out where those poachers came from Gray. Gather your team and head out there. It's a fortress on the edge of Possessor's Crags near the suburbs of Landfall City. I know it's hot, but you need to go in and destroy the place before they move their base of operations. I suggest you take an Esky full of cans with you. You'll need the fluids."

Singh was delighted to get the news about a walk in the midday sun. So delighted that he sulked all the way to the jump-off point. The other two were less obviously unhappy about a walk in the sun. Or rather, a rough climb in the sun.

Fortunately, the team worked well together despite that. They climbed the crags towards the fortress, neutralising some untrained militia in the process. More untrained militia and poachers were occupying a small village at the top of the crags. These took a little longer but were fairly quickly neutralised. The heat slowed them down, but they systematically suppressed and then neutralised the hostiles. Then it was on to the fortress. A machine-gun team offered a real threat, but grenades and heavy fire let the team close on it and take it out. The other guards presented much less of a threat and were very quickly neutralised. Gray planted the explosives after they had neutralised all the hostiles at the fortress, and the walls came tumbling down.

The team withdrew to the pick-up point unharmed.

These games are getting quite samey to report. The basics of activating each location are to pile fire on the enemy to suppress them, and then to close and neutralise them with effective close range fire and grenades. This is easier where collateral damage is not a problem. Occasionally, the hostile deck throws up something a bit weird and wonderful that makes things hairier or the dice do not cooperate, but the basic tactics remain the same. I'm not sure how interesting that is to read, so I plan to make the subsequent reports in this campaign more summaries that note interesting happenings.

+4 VPs = 10 VPs. Going nicely so far.

+4 Mission Points. I did not have enough points to buy Gray the skill I wanted so I save these until after the next mission. Hopefully, that goes well and I can buy it then.

Mission Adjustments: -1 loadout. This combines with the previous penalty so Gray now has a -2 loadout penalty and can carry 2 points less of equipment.

Skills cost +1 point.

Monday, 5 September 2022

A Walk in the Light Green 2: Save the Elephants (Warfighter in Africa)

 This Warfighter campaign uses the Warfighter Modern Australian pack as the player side and African Warlords packs 1 and 2 for the adversaries and missions. This is the second game in the campaign. Click here to read the previous game.

 2nd Lieutenant Gray had blown up the holdout and obtained crucial information about the poachers' activities. The problem with doing a good job, he mused, was that it only led to more and harder work. At least this time it was worthy work though. He had recovered intel that pointed to the next poaching raid.

"Take Singh and Harper with you," his CO announced at the briefing, "then give those damn poachers a kicking."

Their orders were to patrol through farmland to the site of the anticipated attack and to eliminate all hostiles encountered. Singh and Harper looked delighted to be getting a walk in the hot sun but neither said anything. They did not need to, given the looks on their faces.

As the team approached the start of the mission area, they spotted enemy gunmen ahead. Singh closed on them quickly, killing one and taking the other out. Harper and Gray followed up, and Harper finished off the gunment. Gray sprayed fire towards an enemy patrol ahead, but not enough to completely keep their heads down. Harper got tagged by a shot. Just a flesh wound but enough to slow him down.

Farm patrol mission for Warfighter with the path through one Farmland location card to the Save the Elephants objective card

The three soldiers pushed forward fast to the objective, giving the patrol no chance to fire again. The objective area was a flat field near a drinking hole. Poachers were loafing nearby smoking and chatting, while another group of poachers were trying to rile them up and get them to focus on the ivory they were meant to be collecting.

The team opened fire. There were no rules here and they could freely hose the enemy down. The patrol went down to rapid fire. The relaxing guards quickly followed courtesy of a well-placed grenade. The remaining hostiles were mainly encouraged to get their heads down, only managing to fire a few shots that caused Singh to duck into what little cover there was while Harper sweated in the midday sun and struggled to keep up. Gray pushed the two soldiers on just the same.

A final couple of bursts of fire from the team sorted the remaining poachers and the team were done. These elephants would live to drink from this watering hole another day.

I've played this objective a few times and always found it difficult to win when playing low points count missions. I was seriously helped by drawing the Heavy Military Presence event which means that you can score multiple hits with burst and full auto fire. Normally, you need a weapon that has spray fire or grenades and claymores to score multiple hits. The down side to this card is that you run out of ammo faster. Fortunately, I drew Reload cards and cards that gave the team extra firing actions before we went in, so it was simpler than usual. Heat did not prove to be an issue, although it did cost me an action, but the action card draws made up for that too. All in all, the lads done good and will be rewarded by being given a more difficult job next time around.

+3 VPs = 6 VPs. A good start to the campaign.

+3 Mission Points. I bought Gray Explosives skill so that his grenade and claymore usage is more effective in future.

Mission Adjustment: Skills cost +1 point. It's going to be more expensive to buy new skills for Gray, but I was going to have to save up anyway now that I have the cheapest skills I was really interested in.

The -1 loadout adjustment still applies from before too. The accumulating mission adjustments make the game a bit more difficult while the skills that the player soldier gains make it easier. Depending how you roll, it could be a lot more difficult or just a bit. I would not like to play this objective with its time limit on clearing the area if I had rolled increases in number of hostiles in the zone.

As a final bonus, I think I managed to remember all the rules properly this time around!

Sunday, 4 September 2022

A Walk in the Light Green 1: The Warlord's Holdout (Warfighter in Africa)

This Warfighter campaign uses the Warfighter Modern Australian pack as the player side and African Warlords packs 1 and 2 for the adversaries and missions. I love that there is a Save the Elephants objective, and I fully plan to replay it several times with different player forces. I was tempted to make this an early 1980s campaign and give the Australian side SLRs, but in the end I was weak and let them have ALL the toys.

 2nd Lieutenant Gray had been given a mission. Poachers in the Bwendi Republic were expanding their operations and needed stopping. He was going to be leading one of the special forces teams into the bush to deal with their operations, mop up resistance and generally make their activities untenable. Of course, he reflected, the top brass could do that better by providing opportunities and development that made poaching less lucrative for the warlords as it was, but he was going to do his bit on the ground.

His first mission was to infiltrate a local warlord's holdout and he was going in alone, unless you counted the chopper crew, who were ferrying him to his jump-off point.

Warfighter cards showing the path of the mission from Helo Drop, through Rocky Ground to the Warlord's Holdout

To do the job, he was loaded down with all the Claymores and grenades he could carry and was going to have to climb to the top of this rather large mountain and blow shit up. That was why they paid him the big bucks. He was good at blowing shit up.

Touchdown. the climb began. Just a few very relaxed guards on duty here, but, Christ on a bike, it was hot. He should have brought a Camelbak with him. Next time. His first shots suppressed the guards and then he closed and finished them off. No trouble. Pause. Catch his breath. Move on.

The holdout was not well-guarded. He reckoned they thought people would not be idiotic enough to climb up to it the hard way. More fool them. Gray was a total idiot and knew it. What is more, he did not care. The guards were more alert here. They'd heard the shots. That did not help them. He cleared the way to the main compound with a grenade and started planting the charges. As he did so, he found a note about a poaching operation that was due to start soon. Base would want to know about that.

Time to make like a banana and split. As he ducked down the slope back to the chopper, the charges blew and the holdout was destroyed. Score one for the good guys.

3 VPs in the bag.

I used the 3 Mission Points that were scored to buy Agile skill. If Gray is going to be climbing more mountains, the extra movement point will come in handy.

The Mission Adjustment dice roll for the next mission was -1 loadout for all new missions. That's one fewer grenade that Gray can carry or anything of similar size. That could hurt on later missions where the troops have to go in light anyway. We'll see.

The Environment (Hot) did not affect the game significantly, but I'm going to make sure he has a canteen or two in future games so that he does not lose actions due to being too hot. Failing the heat roll means getting Suppressed or taking a Wound, unless you have equipment to mitigate the failure. The former will slow you down, which you don't need. The latter reduces the number of cards you can draw and is really quite undesirable. Water or other means of hydration are your friend.

Sunday, 28 August 2022

Twilight 2022: Through Eastern Europe with a Polish Squad (Warfighter)

 I got a physical copy of Warfighter a couple of weeks ago and have been playing it non-stop ever since. Well, not quite non-stop. After all, I need to go to work and eat and sleep, but you know what I mean. I'm not really interested in the Middle East as a zone of conflict, so I bought a few different packs with the game to offer different theatres to fight in:

  • Eastern European Adversaries
  • Polish Soldiers
  • African Warlords 1 and 2
  • Australian Soldiers
  • Elite Drug Lords
  • Upgrade kit (replacement cards for some older versions)

These all arrived very quickly in good condition from Philibert in France and the VAT on the purchase was dealt with as painless a way as possible. The charge from the Norwegian Post Office for taking the VAT from me is another matter, and makes it only worthwhile saving up to buy larger orders, but I had mentally prepared myself thanks to a very handy import calculator on the customs website. I had originally considered buying direct from DVG because of a special deal on their website but the cost of postage from the US is just ridiculous and would have meant no actual saving once all the other costs were taken into account.

So, with the game in my grubby mitts, I immediately set to sorting through the cards and swapping out the older versions for the upgrade kit versions where necessary. The next day, I worked my way back through all the cards again because I was convinced I had done it wrong! In some cases I had. Oh, the ignominy!

Then it was time to set up. I picked out the Polish soldiers and the Eastern European Adversaries, and prepared for my first game. There are six mission cards and six objective cards in the Eastern European set. I planned to pair each mission with an objective and play them all. I started small with short missions and only a couple of soldiers, and built up slowly. Each game taught me new things, and I managed to get different rules wrong every time, so the novelty was strong. As I fought across Europe, I blew up combat helicopters, armoured scouting forces, and had to run for the border to escape the bad guys. This last was one where I seriously messed up the rules and made things much harder for myself than necessary. My escaping soldiers woke up after a dream in which they were caught and killed by Elbonian patrols. They escaped on the second try, thankfully.

The Final Mission

The team get ready to move in on the target

My final mission for this series was huge. I had more points to buy kit than you could shake a stick at and could have easily bought way more than the maximum eight-soldier squad size (limited by the counter selection). I chose to buy expensive player soldiers supported by a small number of squad soldiers (grunts/henchmen/minions/supporting cast types). I then outfitted my player soldiers with a huge array of things that go bang and the skills to use them to greatest effect, including drone strikes (yay for drone strikes!).

The mission was a political one. We had to advance through enemy territory and destroy an ICBM launcher. For once I drew enough location cards to get started right away, so my troops moved out down a busy highway. And we marched straight into a military convoy led by a T-72. Yikes! The explosive expert rolled well and made short work of it though, thanks to judicious use of a mine (Do the Polish army not have man-portable anti-tank weapons? There are none in the mix). The rest of the team took out the supporting truck. Meanwhile, patrols started appearing. They begin at the objective and move towards you. There are a lot of patrol cards in this pack.

With the highway cleared, we moved onto a dirt road, heading for the city. More patrols started heading out from base and we encountered sentries, security teams and the occasional light vehicle as we moved through the farmland into the industrial outskirts of the city. It became an exercise in suppressing the enemy, moving on their location and then eliminating them. As we moved into the city, we encountered more air support and I had to burn experience points to evade it, because I found my dice rolls with my anti-air system were terrible, and then I ran out of rockets for it. I think I must have dodged three or four combat helicopters.

There was a heavy firefight in the city streets as we pushed through the crowds to the residential areas. Fortunately, I had sniper support to pick off some of the enemy and the drone strikes for bigger targets. And then we were down a shady avenue to the edge of the big enemy parade. There was a lot of security here and we needed to deal with it before we could get to the ICBM. Well, we did not have a lot of time so I threw everything at the enemy. Fortunately, this was enough to suppress the screening troops and we closed on the ICBM. A few well-placed mines and grenades saw it destroyed and it was time to bug out of there. Job done.

While playing this mission, I chose to play location cards that I thought linked up together to give a sense of where my troops were moving. I liked the thematic idea there, and it did not seem to make the game much harder than it would have been otherwise. It made for a satisfying narrative in my head as I played.

Conclusion

These Eastern European missions made me think very much of playing Twilight 2000, back when it first came out. I'm tempted to play a campaign like the jungle one I posted before, but linking Eastern European missions and objectives together to make a story about escaping back home. Could be fun. But first, I am going to take my Australian soldiers on a tour of duty in Africa. There are poachers to defeat and elephants to save.

And then I can think about which expansions to get next. When I got the VASSAL module for this game, it included everything up to a certain point so it has more options than I currently have in playing the physical game. I did not really miss those extra options in playing this time around, but it would be nice to have them, and I definitely want to expand my options for different forces to use and different adversaries to face. I can see this game hitting the table quite a lot, simply because the smaller scenarios are so quick to play that it will fit neatly into a busy everyday, and offers options for when there is more time too.

Saturday, 20 August 2022

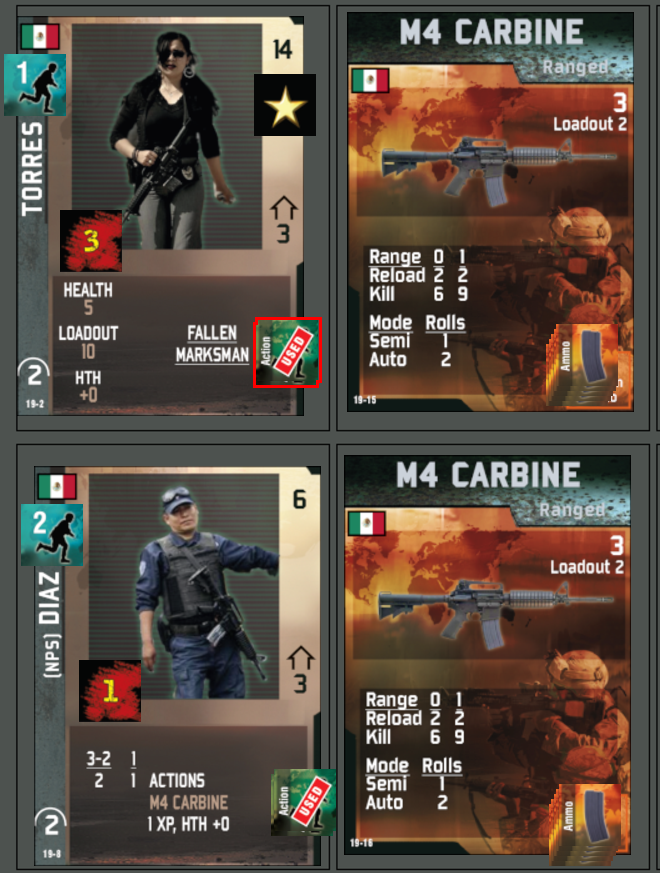
Sicario 4: Showboat (A Warfighter campaign)

Campaign situation at the start

Victory points: 13

Mission points: 5

Mission adjustment: add 6 to the objective's hostile value / add 1 to the cost of all future skill card purchases

I spend all 5 mission points to give Torres Shooter skill (better chance to hurt the hostiles).

Showboat

This is an escape mission. The team must get from the objective card to the mission card. Luckily, I drew a location card as part of my initial action card draw. That will help.

Torres is unhappy. The mission had gone well but now the bad guys are on her tail again. It looks like it is going to be a difficult run back to base. Worse yet, it looks like they will have to take a detour. Still, she has a good line to base and they are promising support.

She orders the team forward into the clearing ahead. Ambush! The team open up and score kills. Guards pop up ahead of them and a horde of hostiles behind. Torres calls down mortar fire on some and a sniper kills others. Diaz and Rodriguez lay down fire and suppress the enemy. They have this under control.

But then the path they were following turns out to be a dead end. They have to backtrack around a ravine. Guards occupy the area and the team suppress them, but they are dug in too well and it proves impossible to eliminate them.

The mission deadline passes and the team is still in the field. Tired but unhurt, they work their way around the guards and crawl back to the base under cover of dark, but they are too late and have failed.

Final Result

Victory Points: +0 = 13 Tactical Victory

Well, that's it for the campaign. A failed mission means the end of the campaign. I scored a tactical victory overall.

This game was a bit frustrating. I spent most of Torres' actions on drawing cards and only drew 2 location cards, one of those only after spending a whole turn in the clearing without being able to move. That is a below average draw. I could not risk ignoring the first location and felt I had to play it, given my track record of not drawing location cards. This gave me one extra location to move through and was the killer for the mission objective alongside an event card that moved the mission time on one turn. One or other of those I could have coped with. Both together left me one turn short.

Despite the frustrating location draws, this was another good game though. I got loads of sniper cards, mortar cards and similar fun toys to drop on the hostiles. Outfitting Torres with a radio meant they were easier to use and they certainly helped in dealing with the bad guys. For a future campaign, I may need to give her more equipment that permits card draws, because I cannot believe the lack of locations I regularly seem to get.

So, two thumbs up for Warfighter. I shall play another campaign with Torres and Diaz another time.

Saturday, 13 August 2022

Sicario 3: Rainy Patrol (A Warfighter campaign)

Campaign situation at the start

Victory points: 8

Mission points: 6

Mission adjustment: add 6 to the objective's hostile value.

I spend all 6 mission points to give Torres Guts skill (spend XPs to remove suppression) and Explosives (bonuses using explosive attacks). I figure that she knows Diaz well enough now to be able to keep him motivated and she has been throwing grenades around long enough to know how best to use them.

A Rainy Patrol

The rain is pouring down. It's a miserable day for a patrol but the Colonel says they must go, so go they must. The objective is a drug shipment and the Colonel has assigned Rodriguez to the team for this mission.

"You'll need the extra firepower," he said reassuringly.

Torres is not happy. She is pretty certain that Rodriguez is on the take, and would have done something about it, but she cannot prove anything yet. They set off into the rain. Things quickly go bad as the instructions they were given do not match the ground they were deployed to.

Can't believe that Torres had to use all her actions to draw new cards until I got a location to play! That's 15 cards into the deck before a location card turned up.

The route to the objective

Eventually, she gets them on the right route, and soon they are heading for a marshy area near the base. Time to get their feet wet. Literally. And then things get hot. An ambush party is waiting for them already! They settle in and open fire. There is a lot of noise but few results other than forcing the hostiles to keep their heads down. A grenade causes the ambush party some issues, but it seems like the rain is affecting everyone's aim. After what seems like an age, Torres finally downs the last of the hostiles, but has burned through two full mags in the process. Things have not started well and they still have a long way to goMoving on, the team once more gets lost!

Again, Torres has to use two discard and draw actions to get a location card. sigh

Opposition is light as they make the climb through the rocky ground, but the team is still burning through its ammo. At this rate they will have nothing left by the time they reach the objective, if they reach it and do not get lost on the way again.

Looks like the maps are right this time. As Torres sighs in relief and directs the team to a stream they need to cross to reach the objective, suddenly another ambush team ducks up. This time, they make short work of the ambushers and quickly push on. Pausing to catch their breath, Torres notices some useful gear among the ambushers' kit and quickly appropriates it.

"Are we ready?" Torres asks quietly.

Diaz and Rodriguez nod in the affirmative.

"Ok, let's go."

They move on the objective and suddenly the place is swarming with cartel. The moment's preparation proves to be enough. Torres directs the other's fire and soon cartel are falling like ninepins. There are still some left though, and those are advancing on Torres' position. She orders Diaz and Lopez to advance on the objective. With any luck they can divide and conquer the enemy, using the hostiles' own movement against them.

Hostiles, Captain! Fahsands of 'em!

The plan works. Working together, the team whittles down the cartel while keeping the hostiles' heads down, but only just in time. They bug out with the drugs and now all they need to do is get back to base before the rest of the cartel members turn up.

Results

Victory Points: +5 = 13

Mission Points: +5 = 5

Mission adjustment: add 6 to the objective's hostile value / add 1 to the cost of all future skill card purchases

Well, I don't mind paying a bit extra for skills.I'm just glad that I did not get another add to the hostile value. That made this mission scary enough. I mostly remembered the rules while playing this time around too, so that is a bonus.

It was frustrating at the start that I could not seem to draw location cards. That added time pressure and tension to the game. On the other hand, I did well with shooting. I got good cards to support the shooting attacks and managed to keep the enemy suppressed so they never got a shot off at me, even if I did burn through ammo in the first half of the game. Thanks to the early lack of location cards, this game came right down to the wire. Good fun.

Saturday, 6 August 2022

Sicario 2: Bugging Out (A Warfighter campaign)

 Last episode, Torres and Diaz took out a drug cartel convoy gaining 3 VPs. Torres also has 1 RP towards new skills but cannot buy anything just yet.

Mission adjustment: add 3 to the objective's hostile value.

With the convoy destroyed, Torres and Diaz needed to get out of there. I rolled for the objective and scored Bugging Out. This is an escape mission where the team has to get from the objective to the mission card.

Grabbing ammo and gear from around them, the pair reequipped hastily and prepared for the worst. Taking a swig from her canteen, Torres outlines the plan: "We'll make for the river. Once across there, they can't easily follow."

I have 11 turns and the first location card I draw is a hidden cache, so I can grab some gear quickly too. I need to move at least every second turn, which means clearing out, or outdistancing the hostiles every two turns.

The pair approach the storage unit carefully. Diaz works round the flank and busts into the structure. He suppresses the look-out, quickly reloads and sprays fire at the drug runners, keeping their heads down too. While Diaz is forcing them to keep their heads down, Torres busts in the front door and drops a terminal grenade on the look-out. At this point, their pursuers catch up with them. Suddenly, there are bad guys leaping out of the woodword everywhere, but on the positive side, Torres finds a pile of gear, including a GPS that shows her a better route to escape (+2 turns to the mission). Pausing briefly to catch their breath, the pair lay down as much fire as they can and make a break for it.

It's not looking good. There's a ton of bad guys after them and Diaz is already hit. They push on. More bad guys appear. They fight their way through the stream and up an incline.

"Where the hell did they get an RPG from?" mutters Torres, "Well, scratch that one."

She hurls her last grenade at the two men with the RPG, destroying their ability to return fire. Unfortunately, there are more of the bastards and she catches lead in a couple of places as she urges Diaz forward. Between them they smoke several more hostiles, but ammunition is running low.

As they approach the river, an elite guard squad leaps up from cover. Two bursts of fire make the guards keep their heads down. Diaz yells that he is out, and Torres chucks him her last spare mag. They roll down the incline towards the river, firing as they go, and push on into and across the river.

Diaz gasps, "I'm getting too old for this shit!" as friendly hands help the pair back to the base's aid station!

Victory points: +5 = 8

Mission points: +5 =6

Mission adjustment 1: add 3 to the objective's hostile value.

Mission adjustment 2: add 3 to the objective's hostile value! (Ouch!!)

I got a couple of things wrong in this one, like being overenthusiastic drawing for reinforcements. You only draw for the card(s) your soldiers are on. I forgot that at the start. Ah well, I shall remember next time. And I have 6 points to spend on skills for Torres. What has she learnt from this mission?